Shelterlogic 62783 Garage-in-a-Box RoundTop User Manual
Browse online or download User Manual for For the car Shelterlogic 62783 Garage-in-a-Box RoundTop. ShelterLogic 62783 Garage-in-a-Box RoundTop User Manual
- Page / 30
- Table of contents
- BOOKMARKS
- Assembly Instructions 1
- RoundTop 3
- 1. ASSEMBLE END RIBS 4
- 2. ASSEMBLE MIDDLE RIBS 4
- 6. CONNECT REAR END RIB 6
- 7. SQUARING UP THE FRAME 7
- 8. PROPERLY ANCHOR FRAME 7
- End Rib Anchors 7
- 05_62780_62783_0BPage 9 9
- COVER RAILS 10
- Garage-in-a-Box RoundTop 11
- Garage-in-a-Box RoundTop 13
- REMARQUE : 14
- Nervure Centrale 15
- 6. FIXEZ LA NERVURE ARRIÈRE 16
- C1 C2 C3 18
- B1 B2 B3 18
- REMARQUE: 19
- RAILS DE TOILE 20
- 1-800-524-9970 21
- 1-800-559-6175 21
- Quantity Part # 23
- Description of Parts: 23
- Página 24 05_62780_62783_0B 24
- DE LA COSTILLA FRONTAL 25
- DEL FRENTE 25
- Anclajes de la Costilla 27
- Página 29 05_62780_62783_0B 29
- BARRAS DE LA 30
- CUBIERTA 30
Summary of Contents
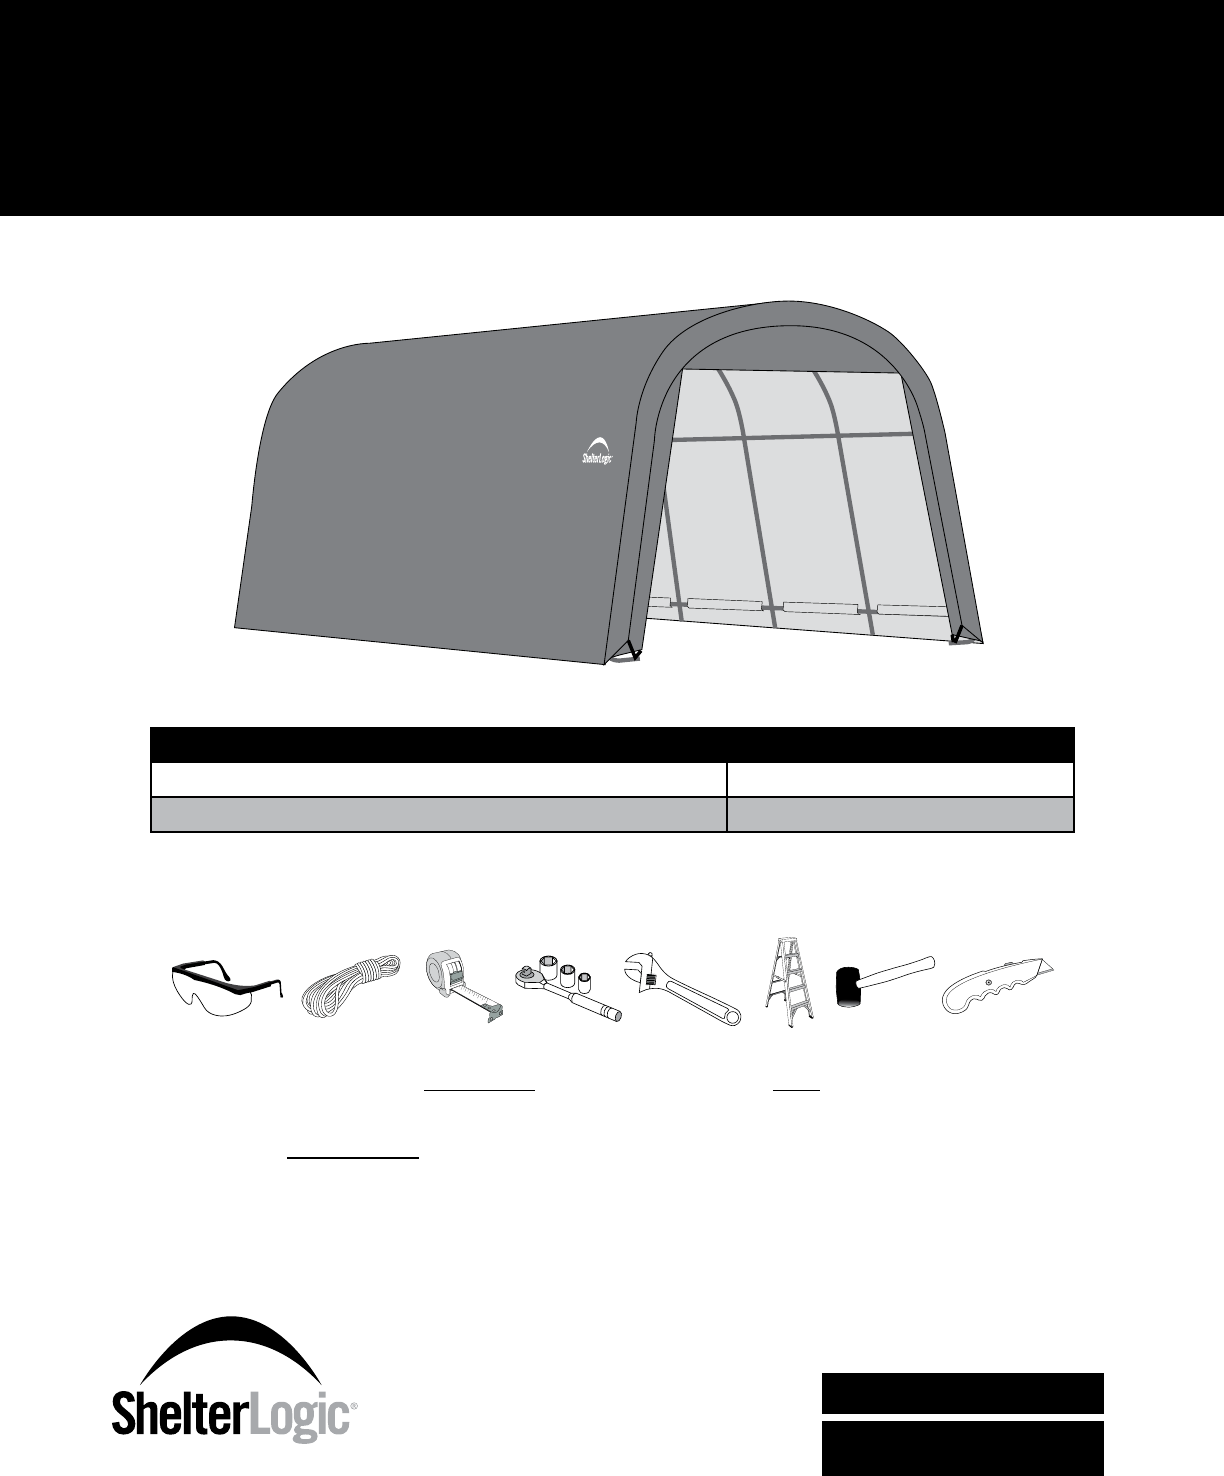
05_62780_62783_0BPage 1 12' x 20' x 8' Garage-in-a-Box RoundTop® Assembly InstructionsDESCRIPTION MODEL #Garage-in-a-Box RoundTop® -
05_62780_62783_0BPage 101011580269513202800958010110101010. INSTALLING COVER WITH COVER RAILSA. Lay the cover on the ground next to the frame with ins
Page 11 05_62780_62783_0BDÉSIGNATION MODÈLE N°Garage-in-a-Box RoundTop® - Gris62780Garage-in-a-Box RoundTop® - Brun627831-800-524-99701-800-559-6175
Page 12 05_62780_62783_0BRisque d’incendie. Ne fumez PAS et n’utilisez AUCUN dispositif produisant des ammes (p. ex., un barbecue, un foyer, une frit
Page 13 05_62780_62783_0B36Toile - Gris (Modèle No. 62780)Toile - Brun (Modèle No. 62783)Porte à 2 Glissières - Gris (Modèle No. 62780)Panneau Arri
Page 14 05_62780_62783_0B80095880092380092312270122708009218009218009208009198009208009398009398009398009398009218009218009588009198009208009208009208
Page 15 05_62780_62783_0B10115802695132028009580101101010030328009390303201010010108009208021298009213. FIXEZ LES TRAVERSES ET LES RAILS DE TOILE À LA
Page 16 05_62780_62783_0B8021305. FIXEZ LES AUTRES NERVURES CENTRALES Pour xer les raccords ShelterLock® , utilisez les Boulons n° 03032 (1 7/8 p
Page 17 05_62780_62783_0B12 pi3,7 m7. METTEZ L’ARMATURE EN ÉQUERREA. Placez l’armature à son emplacement dénitif, dont la surface doit être aussi pla
Page 18 05_62780_62783_0BA1C1 C2 C3A29. INSTALLATION DU PANNEAU DE PORTE ET DU PANNEAU ARRIÈREA. (1) Placez le panneau d’extrémité dans le haut au cen
Page 19 05_62780_62783_0BTIREZSANGLEDE FPANNEAU D’EXTRÉMITÉ – VUE DE L’INTÉRIEUR DE L’ABRID. Dans le bas, à l’endroit où la sangle sort du fourreau de
05_62780_62783_0BPage 2Risk of re. DO NOT smoke or use open ame devices (including grills, re pits, deep fryers, smokers or lanterns) in or around
Page 20 05_62780_62783_0BCORRECT802695INCORRECT10. INSTALLEZ LA TOILE ET LES RAILS DE TOILEA. Étalez la toile sur le sol à côté de l’armature en plaça
Página 21 05_62780_62783_0BDESCRIPCIÓN MODELO #Garage-in-a-Box RoundTop® - Gris62780Garage-in-a-Box RoundTop® - Marrón627831-800-524-99701-800-559-6
Página 22 05_62780_62783_0BRiesgo de incendio. NO lo use con artefactos humeantes o de ama abierta (incluyendo asadores, fogones, freidoras, ahumador
Página 23 05_62780_62783_0B36Cubierta - Gris (Modelo No. 62780)Cubierta - Marrón (Modelo No. 62783)Puerta de 2 Cremalleras - Gris (Modelo No.62780)
Página 24 05_62780_62783_0B800958800923800923122701227080092180092180092080091980092080093980093980093980093980092180092180095880091980092080092080092
Página 25 05_62780_62783_0B1011580269513201800923010100101110115802695132028009580101101010030328009390303201010010108009208021298009213. CONECTAR BAR
Página 26 05_62780_62783_0B802130101158026958026951320180092301010010110101001011030328009390303201010010108009208021298009210303280093903032010100101
Página 27 05_62780_62783_0BNOTA:Los taladros de 15" pulgadas están para el uso temporal solamente! Para los mejores resultados ShelterLogic recom
Página 28 05_62780_62783_0BA1C1 C2 C3A29. INSTALACIÓN DEL PANEL FINALA. (1) Mantener el panel nal en el centro superior de la supercie interna blanc
Página 29 05_62780_62783_0BESTIRECORREASDE F9. CONTINUACIÓN DE LA INSTALACIÓN DEL PANEL FINALVISTA SUPERIOR DEL PANEL DENTRO DEL TOLDOD. En la parte i
05_62780_62783_0BPage 3Bolts 1/4 x 1 7/8 in. / 6,4 x 47,6 mm36Half-Clamps for Middle LegsCover - Gray (Model # 62780)Cover - Brown (Model # 62783)
Página 30 05_62780_62783_0B1011580269513202800958010110101080269510115802695802695132018009230101001011010100101110. COLOCACIÓN DE LA CUBIERTA Y DE LA
05_62780_62783_0BPage 41. ASSEMBLE END RIBS2. ASSEMBLE MIDDLE RIBS800958800923800923122701227080092180092180092080091980092080093980093980093980093980
05_62780_62783_0BPage 51011580269513202800958010110101003032800939030320101001010800920802129800921101158026951320180092301010010113. ATTACH CROSS RAI
05_62780_62783_0BPage 68021301011580269580269513201800923010100101101010010110303280093903032010100101080092080212980092103032800939030320101001010800
05_62780_62783_0BPage 712 ft.12 ft.7. SQUARING UP THE FRAMEA. Place frame in its nal location, which needs to be as at and level as possible.B. Chec
05_62780_62783_0BPage 89. DOOR PANEL AND BACK PANEL INSTALLATIONA. (1) Hold end panel at the top center with white inner surface facing inside of the
05_62780_62783_0BPage 9PULLWEBBINGSTRAPEND PANEL VIEW FROM INSIDE SHELTERD. At the bottom, where the webbing exits the pocket on each side of end pane
Related products and manuals for For the car Shelterlogic 62783 Garage-in-a-Box RoundTop


 (24 pages)
© 2020, manymanuals.com. All rights reserved. | 0.086 s |
 Manymanuals.com
 Manymanuals.de
 Manymanuals.fr
 Manymanuals.it
 Manymanuals.pl
 Manymanuals.cz
 Manymanuals.es
 Manymanuals-pt.com
Comments to this Manuals